Documentation / Setup & operating guide
Build your first reusable workflow.
Install Runner, connect your agents, configure supervision, and learn every current workflow control.
Getting started
Build a purpose-built agent or a reusable workflow, then run it with a supervisor on a connected machine.
Inflara coordinates research, repeated automation, document work, and software delivery. A workflow defines the process; a run supplies fresh inputs. Runner executes the work on a paired machine, while Agent Center manages assignments, state, evidence, and supervision.
Your first-run path
- Create an account and project, and describe one bounded outcome.
- Install and authenticate at least one supported agent CLI on your machine. Install and pair Inflara Runner.
- Configure the global Inflara skill and MCP access, then map the project folder if you use a coding workspace.
- Keep Runner online and verify the machine and agents in Agent Center.
- Save a supervisor and role pools. Draft a workflow or choose a preset and inspect its steps.
- Supply run inputs, review permissions and limits, execute, and accept the result only after its evidence checks.
Account, projects, and API access
Create the operating scope before connecting the execution machine.
- Sign up or sign in. Select the Inflara instance you intend to use; its projects, tokens, and paired machines form the scope of this setup.
- Create a project for the process. For task-driven work, add a task with an outcome, constraints, input material, and acceptance criteria. A supervisor can draft a workflow with no tasks selected.
- Confirm that your project role permits agent execution. Shared membership and role permissions also apply to API access.
- Open Settings → Agentics → Remote access token for MCP/API. Enter a Token name and choose All projects or Selected projects.
- Choose Supervisor (recommended) for a supervisor-capable MCP client, or select the individual scopes the client needs. Create the token and copy the
ifl_...value when it is shown; it is displayed only once.
Two credentials, two responsibilities
| Credential | Use |
|---|---|
Runner pairing credential (ifr_...) | Obtained by inflara login; authenticates the machine’s job and heartbeat connection. Do not use it in an MCP client. |
API/MCP access token (ifl_...) | Created in Settings → Agentics; allows scoped access to Inflara data and orchestration tools. Do not use it as the Runner login token. |
All-project access covers accessible current and future projects; Selected projects limits the token to your chosen projects. Full access grants the current scope set. Supervisor (recommended) selects the displayed supervisor scopes. Individual scope checkboxes restrict available tools. Membership removal still removes access. Revoke a token from its list when it is no longer needed.
| Individual API scope | Permission |
|---|---|
Planner read (planner:read) | Read projects, tasks, workflows, runs, and Runner inventory. |
Planner write (planner:write) | Create and update projects, milestones, and tasks. |
Workflow write (workflow:write) | Create and update graph definitions. |
Workflow run (workflow:run) | Start, control, and reconcile workflow runs. |
Agent run commands (agent-run:command) | Send commands and answer active-run interactions. |
Notes write (notes:write) | Write notes and workflow log output. |
Install agent tools and Runner
Use a laptop for private work, or provision a server, cloud VM, or dedicated sandbox for shared execution.
- Choose the machine where the work should execute. A server or cloud VM must be provisioned by its owner first; pairing does not create a VM.
- Install Codex CLI, Claude Code, or Antigravity CLI separately using the provider’s current instructions. Sign in and complete that tool’s initial workspace or account setup.
- Verify each CLI you plan to use. You need at least one, not all three.
- Install the standalone Inflara binary using the appropriate command below. Open a new terminal if the installer changes PATH.
# Check only the tools you installed
codex --version
claude --version
agy --version
macOS and Linux
curl -fsSL https://download.inflara.io/runner/install.sh | shWindows PowerShell
irm https://download.inflara.io/runner/install.ps1 | iexThe public installer downloads a self-contained binary. Node.js, pnpm, an Inflara source checkout, and Electron are not prerequisites. The desktop Runner companion remains a future GUI option; the supported connector installation is the standalone CLI.
Pair Runner with your instance
Pair on the machine where the workers are installed.
inflara login
inflara status
inflara doctor- Run
inflara login. Approve the browser pairing page with the correct account and instance. - Let the local callback complete. Check
inflara statusfor the selected profile and instance. - Run
inflara doctorto inspect pairing, API reachability, agent binaries, mappings, and service/update status. - Open Agent Center → Machines after Runner is started. Confirm that the expected machine reports a recent heartbeat.
The default profile stores configuration under ~/.inflara/runner/config.json; the macOS credential uses Keychain when available. Named profiles store separate state under ~/.inflara/profiles/<profile>/runner. Pair each execution machine independently.
inflara login --token "<runner-pairing-token>" --url "https://inflara.io"Install the supervisor skill and MCP connection
Make local agent clients able to operate Inflara through its scoped interfaces.
inflara setup-agents --mcp-token "<ifl_api_access_token>"
inflara mcp doctor- Create the API/MCP token in Settings → Agentics, as described above.
- Run
inflara setup-agentson this machine. It installs the global Inflara Supervisor Agent skill and configures the supported clients’ global MCP entries. - Run
inflara mcp doctor. It checks configuration without printing credentials, including duplicate aliases and cross-client token conflicts. - Start new Codex, Claude Code, or Antigravity sessions so they load the updated skill and MCP configuration. Existing sessions may still hold old settings.
| Client | Global skill location |
|---|---|
| Codex | ~/.codex/skills/inflara-supervisor-agent/ |
| Claude Code | ~/.claude/skills/inflara-supervisor-agent/ |
| Antigravity | ~/.gemini/antigravity/skills/inflara-supervisor-agent/; compatibility sync also uses ~/.gemini/config/skills/inflara-supervisor-agent/ |
Targeted setup and repair
# Preview before changing existing client configuration
inflara mcp repair --dry-run
inflara mcp repair

# Limit setup to one client, or one part of setup
inflara setup-agents --agents codex
inflara setup-agents --skills-only
inflara setup-agents --mcp-only
MCP repair can reuse one agreed API token, remove duplicate Inflara aliases, preserve unrelated servers, and create timestamped backups. Token conflicts must be resolved; repair does not alter Runner credentials. --skills-only and --mcp-only are alternatives, not flags to combine.
You can supply INFLARA_MCP_TOKEN through your shell’s environment instead of a command argument. Inject the real secret using your preferred secret handling; the snippets here use placeholders and never contain real credentials.
Map project folders and prepare context
Local folder mapping is per machine and profile; repository metadata in the web app is separate.
inflara projects list
inflara projects map "<project name or id>" /absolute/path/to/project
inflara doctor- List projects in the paired instance. Match the project name or ID to your intended work.
- Map that project to an existing absolute local folder on this machine. Use an appropriate repository, notebook directory, Python project, or ordinary working folder.
- Confirm the path exists and the agent can access it. For coding, inspect Git status before the first run.
- In Agent Center → Setup, optionally select the project, enter Repository URL and Default branch, and choose Save mapping. This saves Git metadata, not the local path.
| Workspace | Behavior |
|---|---|
| Mapped Git project | Coding jobs can use isolated worktrees and review branches. Shared workflow mode coordinates one workflow branch. Publication still requires authorization. |
| Mapped ordinary folder | Runs directly in that folder. Edit jobs are serialized; this is not a worktree sandbox. |
| Artifact-only | No repository mapping is needed for its execution directories, but project scope and a compatible worker are still required. Strict output contracts are mandatory. |
Optional repository knowledge
inflara repo map --project <project-id> --refresh
inflara repo init-knowledge --project <project-id>
inflara repo search "<query>" --project <project-id>
Repository maps provide bounded, ranked context. Knowledge scaffolding does not overwrite edited files. These commands apply to repository-backed work; artifact-only execution skips repository discovery and context-map generation.
Trust executable repository configuration
Text guidance such as AGENTS.md and CLAUDE.md remains lower-authority context. Executable configuration—including repository MCP entries, hooks, plugins, and executable files under agent-config directories—is quarantined by default. Review it before trusting its manifest digest. A change invalidates the trust.
inflara repo trust-agent-config --project <project-id>
# Remove the reviewed trust
inflara repo trust-agent-config --project <project-id> --revokeKeep Runner online and size capacity
Use one Runner process per profile and multiple worker slots inside that process.
Recommended: background service
inflara runner install-service --auto-update
inflara runner status
inflara runner logs
The service starts after OS sign-in. macOS uses a LaunchAgent, Linux a user systemd service, and Windows a logon scheduled task. On macOS/Linux installation starts or enables the managed service; on Windows start the task or sign out and back in.
schtasks /Run /TN "Inflara Runner"Foreground and one-shot debugging
inflara runner start
# Keep the terminal open; Ctrl+C stops it

# Process one polling/job cycle
inflara runner run-once
Foreground execution ends with the terminal process. If a background process already owns the profile, inspect it and stop it before foreground debugging. --force is for an intentional duplicate supported by the CLI guard, not the ordinary way to increase capacity.
Parallel worker capacity
inflara runner install-service --auto-update --workers codex=2,claude_code=1,antigravity=1
# The same worker flag also works with runner start
Worker limits are per detected agent type and per profile, with a current maximum of eight per type. Size them for machine memory, provider limits, and your workflow. Slots across profiles add together. Workflow session limits are a separate cap, currently 1–4, covering a parent and its child workflows; queued assignments do not occupy a live provider slot.
Check the connection
inflara status
inflara doctor
inflara smoke
inflara runner logs --follow
A recent heartbeat, an active selected agent, an appropriate project mapping, and a healthy CLI are prerequisites for a normal coding run. A successful doctor or smoke check does not prove advanced research capabilities or strict-output readiness.
Multiple instances on one machine
Use separate profiles and separate folders or clones for each instance.
inflara profiles list
inflara profiles add client-b
inflara login --profile client-b
inflara projects list --profile client-b
inflara projects map <project-id> /path/to/client-b-clone --profile client-b
inflara service install --profile client-b --workers codex=2,claude_code=1
inflara service status --all
Each profile isolates credentials, mappings, state, artifacts, worker settings, and service identity. A canonical folder, including parent/child and symlink aliases, can belong to only one Inflara instance on a machine. Use a separate clone or directory when another instance needs the same project.
| Platform | Default / named service |
|---|---|
| macOS | io.inflara.runner / io.inflara.runner.client-b |
| Linux | inflara.service / inflara-client-b.service |
| Windows | Inflara Runner / Inflara Runner (client-b) |
inflara service stop --profile client-b
inflara service start --profile client-b
# Remove a named profile after stopping and uninstalling its service
inflara service uninstall --profile client-b
inflara profiles remove client-b
The legacy default profile cannot be removed. inflara doctor --profile <name> reports durable machine claims. Review orphan claims before inflara doctor --reconcile-claims; unknown/unreadable owners are preserved.
Agent Center: tabs and navigation
Use the shared operating view to inspect execution readiness, configure supervision, and manage workflows.
| Tab | What to do here |
|---|---|
| Overview | Inspect current operations, active/recent runs, and control-plane checks. Open or restart eligible sessions and inspect their evidence. |
| Supervisor | Use Setup to save the supervisor and role pools, choose a workflow strategy, scope tasks, and queue supervised work. |
| Guide | Read the in-app supervisor tutorial. Use this operating guide for complete setup and reference. |
| Machines | Inspect versions, heartbeats, agent inventory, health, Assistant options, sharing, and revocation. |
| Agents | Inspect detected workers, models, capacity, and features. Launch a Quick Prompt Session. |
| Sessions | Open recent worker and supervisor sessions, inspect state, cancel active work, and restart eligible terminal sessions. |
| Workflows | Create and edit graphs; configure step roles, logic, run inputs, logs, and artifacts. |
| Setup | Open this canonical guide and save optional project Git metadata. |
Refresh reloads the operating data. The top-level Settings control opens app settings; it is different from the Supervisor Setup gear and from Workflow settings. A View only indicator means your available actions are limited by access permissions.
Overview metrics and Control Plane Checks
Machines reports registered and connected counts. Agents reports detected and active workers. Active sessions includes the queued count; Workflows includes running graphs. Recent Sessions shows Context, Agent, Status, Last event, and Action; Inspect opens evidence and eligible Restart controls create another attempt.
| Control Plane Check | If it needs attention |
|---|---|
| Runner machine registered | Pair an unrevoked Runner with inflara login. |
| Agent capability available | Start Runner and check an active detected worker. |
| Active projects have Git metadata | Save appropriate project metadata in Setup for coding work. This generic check is not an artifact-only repository requirement. |
| Saved workflows have steps | Add steps to empty definitions before execution. |
Machines, sharing, and owner permissions
Check the machine you will use and configure only permissions you intend to grant.
| Column / control | Meaning and action |
|---|---|
| Machine | Runner name, profile, and same-physical-machine indicator when other profiles exist. |
| Version | Reported binary version and update/support status. Compare it with doctor, not just the installed file. |
| Agents | The detected native workers reported by this Runner. |
| Last heartbeat / Health | Connection freshness and readiness. No heartbeat or stale health needs diagnosis before dispatch. |
| Assistant | The owner can enable private Inflara Assistant conversations on this machine. Pending changes show Applying on runner until acknowledged. |
| Push & deploy | Additional owner opt-in for explicitly requested publication using local credentials. It does not grant an arbitrary workflow action. |
| Sharing | Private, Specific users, Project members, or Entire instance, plus allowed operations and environment classification. |
| Save sharing / Revoke | Persist the sharing draft, or revoke the Runner connection. Revocation removes its authority to execute new work. |
Share a machine step by step
- Use a dedicated shared machine, VM, or sandbox with limited credentials and mapped folders.
- As its owner, choose Specific users and enter comma-separated user IDs, Project members and select projects, or Entire instance. Private keeps it unshared.
- Set Allow queued agent runs and Show runner status independently. Mark the environment VM or sandbox, Personal computer, or Not specified.
- Choose Save sharing. Verify access using the intended scope; project execution permissions still apply.
Enable Inflara Assistant
Use a connected machine for conversations that can become reviewable workflow work.
- Open Machines and enable Assistant for a Runner you own. Wait for its acknowledgment.
- Open Inflara Assistant in the app and select an available execution machine/agent for the conversation where offered.
- Describe the outcome, recurrence or reuse, input data, checks, budget preference, and what requires human approval.
- Ask it to draft a workflow and assign supervision. Inspect the proposed graph in Workflows before authorizing any action outside the agreed scope.
# Equivalent owner settings for a managed Runner
inflara runner install-service --enable-assistant
# Optional: explicitly requested publication
inflara runner install-service --enable-assistant --allow-assistant-external-actions
# Remove that publication opt-in
inflara runner install-service --no-assistant-external-actions
Assistant and Push & deploy start off by default. Web toggles propagate on the Runner connection without a config edit. The owner permission, user instruction, and any exact workflow action authorization remain separate requirements.
Agents, models, and capability evidence
Choose the worker by machine, model, effort, capacity, and the capabilities the task actually needs.
The Agents table shows Agent, Machine, Capability, Capacity, and Features. Model and effort options come from the detected worker. An agent on another machine does not inherit this machine’s folders, credentials, browser, or MCP grants.
Quick Prompt Session
- Select Agent, Model, and Effort. Leaving a provider setting at its default uses the worker’s current default.
- Select Project and write a Prompt with a bounded outcome.
- Choose Queue prompt, then inspect the new session. Use a reusable graph when the process needs several stages, branching, or repeated inputs.
Network, browser, and native-search requirements
# Owner opt-ins; enable only the tools the process needs
inflara runner install-service --allow-workflow-network
inflara runner install-service --allow-workflow-browser
# Revoke either grant with --no-workflow-network / --no-workflow-browser
In a role step, Required worker capabilities can name source_read, file_write, shell, network, search, and browser. Require verified capabilities adds a fresh-evidence gate. Diagnostics separate available, unavailable, denied, unknown, stale, and unverified states. A configured grant alone remains unverified.
# Optional paid operational canary: use an installed model/effort pairing
inflara runner probe-capabilities --agent codex --model <model> --effort <effort> --include-search --confirm-paid-model-session
Manual evidence expires after five minutes. Eligible roles may opt into job-native lifecycle enrollment through advanced configuration; it requires a lifecycle-capable Runner and exact prepared-policy binding. Denied permissions and unsupported capabilities still fail closed. Successful native search proves search execution, not reading of a cited source body.
Sessions and pending interactions
Inspect the worker or supervisor session before deciding how to continue.
- Open a session from Overview, Sessions, or the Supervisor session list. Inspect the task/project, last event, transcript, and orchestration evidence.
- For an input request, send a Reply containing the missing facts. For an approval request, inspect its scope and choose Approve or Deny.
- Use Resume when an eligible blocked/resumable session offers it. A reply and a resume are different controls; use the one appropriate to the displayed state.
- Use Cancel to stop active work. For an eligible failed task or terminal prompt session, Restart task / Restart session creates a fresh attempt using its saved context. Inspect the cause first.
| Status | Meaning |
|---|---|
| Queued / Preparing | Waiting for a slot or preparing execution context. |
| Awaiting local confirmation | Requires the machine-side confirmation indicated by the run. |
| Running | Worker execution is active. |
| Blocked | A question, approval, prerequisite, or other blocker needs resolution. |
| Ready for review | The agent reported a successful result; inspect acceptance evidence before accepting it. |
| Failed / Cancelled | Terminal failure or cancellation; no successful result is implied. |
Supervisor sessions can include linked workflow state, decisions, messages, and resumable context. Follow the session’s questions instead of launching a duplicate run to bypass the wait.
Set up the supervisor agent
Save one connected worker as the coordinator, then define how it may assign work.
- Open Agent Center → Supervisor → Setup (the gear opens Supervisor settings). Confirm the selected machine and worker are active.
- Choose Supervisor agent. Select Supervisor model and Supervisor effort from that worker’s reported options, or use its default.
- Choose Manual or Auto under Role assignment. Manual uses your saved pools; Auto fills empty pools according to the selected policy.
- Configure the role pools described next. Save setup and check that Live status identifies the saved supervisor and Runner.
- Close settings and use the launch panel to scope and queue work.
Automatic policy choices
| Policy | When to use it |
|---|---|
| Balanced | Balance estimated quality and consumption for ordinary work. |
| Highest reliability | Favor stronger expected reliability when acceptance risk is higher. |
| Lowest consumption | Prefer a lighter configuration when it still fits the role and constraints. |
Inspect the automatic preview, rationale, warnings, and benchmark snapshot date. Apply preview to pools makes those preview assignments explicit. At dispatch time Auto fills only empty pools; manual assignments always win. Without a benchmark snapshot, model selection falls back to agent defaults.
Configure agent role pools
Assign a worker/model/effort combination to each responsibility, with as many perspectives as the task warrants.
- In Supervisor settings, select a card from Available agents. Choose its assignment model and effort.
- Drag that selection into a role, or use Assign selected in the role’s box. Repeat for additional agents/perspectives.
- Inspect each role’s agent count and active/inactive indicators. Remove stale assignments with their remove control.
- Save setup. In Auto mode, leave a role empty only when you want automatic dispatch to fill it.
| Current pool label | Responsibility |
|---|---|
| Planning | Propose an approach and acceptance criteria; use independent perspectives for complex work. |
| Plan synthesis | Compare or combine plans into a coherent executable approach. |
| Coding | Implementation responsibility in the built-in software templates. |
| UI design | Design specialist for workflows with a user interface. |
| Review and bug fix | Independent review and scoped corrective work. |
| Test and fix | Verification and bounded repair/recheck. |
| Recovery | Diagnose and repair a failed path or escalate the blocker. |
| Final QA | Check the combined result against the original request and evidence. |
These pool names reflect the built-in software-oriented templates. They do not limit purpose-built agents to code: use Prompt steps, editable role objectives, and custom graph roles for research, classification, document transformation, or other processes. Adding a worker to a pool is not the same as increasing Runner capacity.
Node-run diagnostics are displayed for diagnosis, not routing evidence. Automatic outcome calibration requires 20 comparable verified results; sparse evidence stays in shadow. Cost and latency remain separate from verified quality.
Launch or draft supervised work
Use Flexible for supervisor-led composition, or an Existing workflow as the primary strategy.
- Choose Workflow choice. Flexible lets the supervisor compose or select a suitable graph. Existing workflow requires you to select a saved graph.
- For Flexible, choose Quick, Robust, or Full team. Quick is the smallest viable pattern; Robust includes planning, execution, review and test/fix; Full team adds competition, specialists, recovery, and final QA.
- Choose Project context. Use the task picker’s Status, Project, Milestone, and search filters to select the intended tasks. Clear filters resets the view. Leave tasks empty for drafting or revising a workflow.
- Write the Supervisor request (up to 5,000 characters). State outcome, scope, evidence, input sources, cost/performance preference, and approval boundaries.
- Review Current mode and scope, then choose Queue supervisor. Open the resulting session and follow linked workflows and interactions.
Create a reusable workflow that produces a weekly market-research brief from the supplied source materials. Separate discovery, specialist analysis, evidence audit, and synthesis. Select models and effort to balance cost and accuracy. Assign a supervisor, bound retries, and require review before any publication. Draft the graph first; identify missing tools or permissions instead of assuming access.With Existing workflow, the supervisor inspects that graph through MCP and may adjust variables, task inputs, prompts, agent/model assignments, or safe settings. Review substantive graph changes. A drafting request is not permission to launch an arbitrary external action.
The permission summary allows scoped task/milestone/workflow edits and operational supervision. Deleting data, changing permissions, unusual compute, or acting outside scope requires the applicable user decision. Human-only approvals must remain human-only in the graph policy.
Create, organize, and edit a workflow
Start with a saved preset or a blank graph; edits persist through the workflow interface.
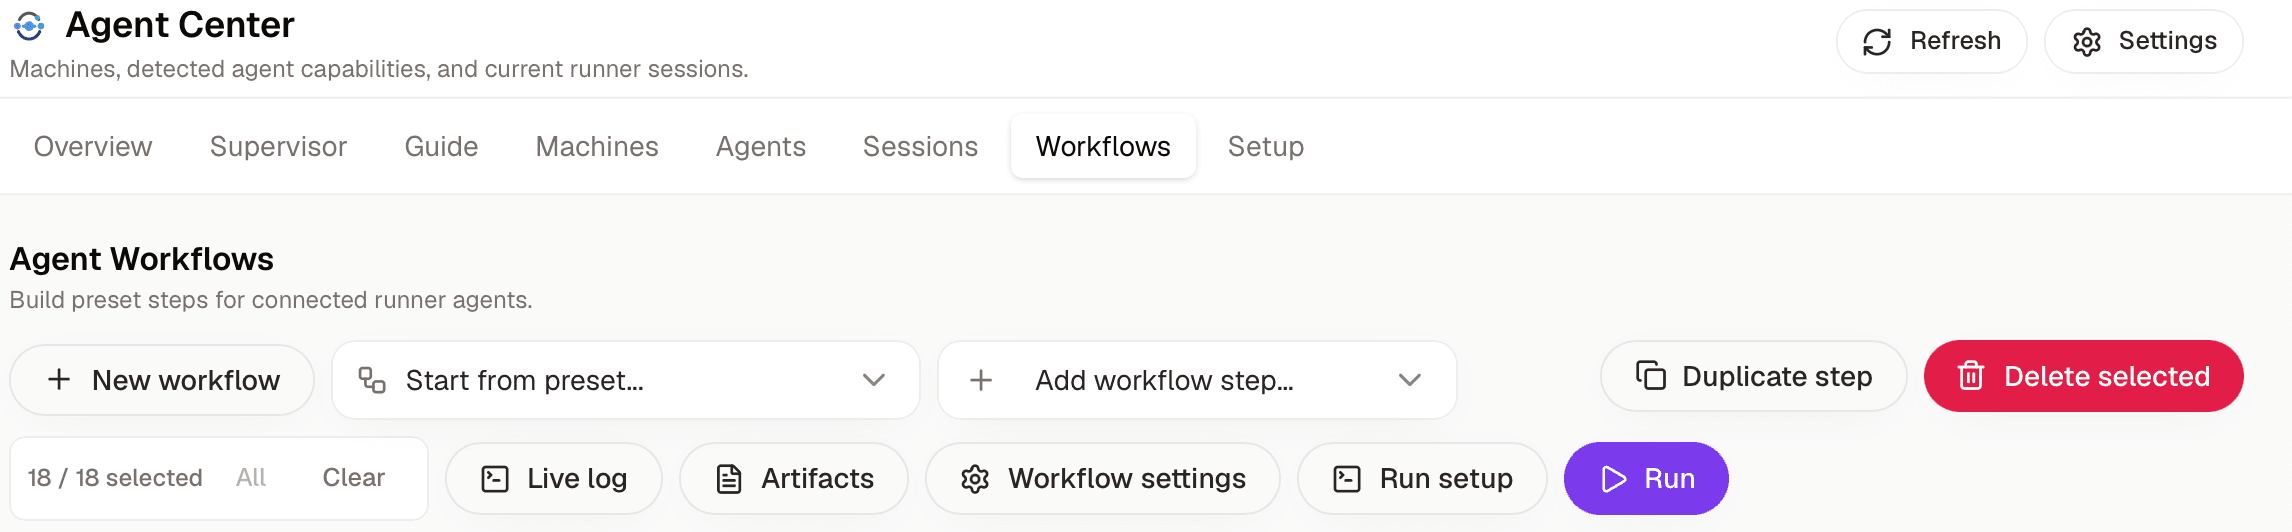
- Open Workflows. Choose New workflow for a blank graph, or Start from preset for a prebuilt pattern.
- Select the graph in the Workflows sidebar. Use its name/menu controls to rename it; collapse or reopen the sidebar to make more canvas space.
- Add steps from Add workflow step. Selecting a source step before adding a branch establishes the intended connection; inspect the resulting edge.
- Open a step to edit its label, run inclusion, agent settings, and kind-specific configuration. Many text fields save when you leave the field; selectors save on change. Check validation feedback.
- Inspect every connection and any orphan/unintended root before running. Use the canvas and branch controls below to refine the graph.
| Control | Use |
|---|---|
| Workflow action menu | Rename the selected definition, Duplicate the entire workflow, or Delete the workflow. A whole-graph duplicate is different from Duplicate step. Deletion removes the definition; it is not a cancel command. |
| Duplicate step | Copy the selected step configuration, then inspect its connections and assignment. The top control requires a node rather than an edge. |
| Delete selected | Delete the selected node or branch. This edits the saved graph; do not confuse it with cancelling a run. |
| N / total selected; All; Clear | Select the steps included in the next run. Individual Run checkboxes change inclusion. A partial run needs the dependencies and inputs its selected nodes require. |
| Zoom in / Zoom out / Fit view | Change canvas scale and framing without changing the graph’s execution. |
| Auto organize workflow | Rearrange nodes for readability. Check the resulting layout; logical configuration is separate. |
| Wrap selected steps in loop | Create a loop around the selected set, then verify body membership, exits, and limits. |
| Live log / Artifacts | Open the utility panel; use its close control to return canvas space. |
| Workflow settings / Run setup / Run | Set durable defaults, configure this launch, and start execution. See their dedicated sections. |
Step and branch selection are different from next-run inclusion. Moving a node does not change its dependency; an edge and its routing condition do. A loop frame’s membership should be inspected in Loop body, not inferred from visual proximity alone.
The step editor’s Flow wiring panel explains Inputs and Outputs, including incoming source artifacts, branch metadata, outgoing destinations, and terminal nodes. Review this summary after editing edges. Close the step editor with its close control; copy/delete controls there act on that selected step.
Start from preset: every option
Presets are editable starting graphs. Inspect their assignments, evidence gates, and failure paths before use.
The current dropdown contains the following 11 options. Several ship with software-oriented instructions; adapt the objectives and checks for research or automation. A research workflow may be composed from a blank graph or through the supervisor rather than assuming a hidden research preset.
Single Worker
One agent owns a bounded task end to end, a verifier checks it, and a report closes it. The cheapest safe shape for docs, small fixes, and focused analysis.
Use it for: A focused analysis, document task, or small change with one clear owner.
Configure it: Set the work, verifier, recovery, and report agents. Replace the acceptance checks with checks appropriate to your output. Pass a task through Run setup when the graph uses workflow input.
Quick Solution
A compact supervisor workflow for one plan, implementation, verification or fix, bounded recovery, and final report.
Use it for: Low-risk work needing a short plan and a compact implementation/verification path.
Configure it: Set the planner and execution roles, review the verify-and-fix instructions, and inspect the failure branches and final report. Use a larger pattern only when the scope warrants it.
Adaptive Robust
Default ordinary implementation workflow: one structured planner, scoped implementation, evidence-gated verification, and up to three repair iterations. Escalation to competing plans or independent review is risk-driven.
Use it for: Ordinary implementation with uncertainty or regression risk. Escalation is risk-driven.
Configure it: Set the structured planner, scoped worker, verification gate, and bounded repairs. Review escalation conditions; competing plans and independent review should be justified by risk.
Robust Workflow
Competing plans, Fuse synthesis, implementation, test/fix, independent review, recovery branches, and final report.
Use it for: Complex work that benefits from competing plans and independent review.
Configure it: Assign both planners, the Fuse evaluator, execution, tester, fixer, reviewer, recovery, and report roles. Verify the loop’s stop flag and failure exit before running.
Full Team With Tests
Intake, three planning perspectives, synthesis, supervisor gate, specialist implementation, parallel test/review, recovery, join, and final QA.
Use it for: High-complexity work needing several planning perspectives, specialist execution, and final QA.
Configure it: Inspect intake, three planners, synthesis, supervisor gate, parallel test/review, recovery, evidence join, and final QA. Set every worker binding and concurrency limit. You can add further branches when capacity and the task justify them.
Plan Competition
Two planner agents create independent structured plans, then a Fuse judge selects or synthesizes the best path.
Use it for: Compare independent approaches before committing resources to execution.
Configure it: The preset starts with two planners and a Fuse judge. Assign distinct perspectives, define shared acceptance criteria, and set how the judge selects or synthesizes results. Two is the initial graph, not a platform limit.
Plan + Second Opinion
One agent drafts a plan, a second agent critiques it, then the workflow branches to implement or revise.
Use it for: A lighter alternative to planning competition: draft, critique, then proceed or revise.
Configure it: Choose a planner and independent critic. Inspect the implement/revise routing and the evidence the critic must return.
Implement + Test
An implementation agent hands off to a test agent, with explicit repair branches for failed implementation or verification.
Use it for: Work whose plan is already clear and needs execution followed by verification.
Configure it: Set the implementation and test agents and connect failure recovery. Check that the test role verifies the actual result, then routes a repaired result back through verification.
Plan + Implement + Test + Deploy
A release-oriented workflow that plans from workflow input, implements, verifies, reviews, recovers failures, gates release approval, then pushes or deploys only when approved.
Use it for: A release process requiring planning, execution, checks, review, and approved publication.
Configure it: Configure the approval gate and exact publication target as well as the work roles. Deployment requires a supported provider, local owner permission, credentials, and exact external-action authorization; the preset cannot grant them.
Human/Agent Approval
An approval packet gets agent risk review, explicit human approval, then bounded execution and verification.
Use it for: A proposed action must receive risk review and an explicit human decision.
Configure it: Prepare an approval packet with scope and evidence, configure the risk reviewer, retain the human gate, and verify the approved action. Check the rejection and blocked paths too.
GitHub PR Automation
Implement on one workflow branch, verify and review in parallel, recover failures, gate with supervisor approval, then push and open a PR.
Use it for: Software changes should end in a reviewable GitHub pull request.
Configure it: Map the repository, use one workflow branch, assign parallel verification/review and recovery, then inspect the supervisor gate. Complete exact commit/branch authorization and owner opt-in before publication.
Add workflow step: every option
Choose the smallest primitive that expresses the next responsibility.
Task step
Run an Inflara task. Choose Specific task for a fixed assignment or Workflow input task to reuse the same graph with a new task. Configure project, agent, model, effort, execution mode, and Extra prompt. In a for-each loop, use the supplied task context rather than hard-coding one task.
Prompt step
Give an agent instructions without binding a task. Select a project and worker, then write the Prompt. Suitable for investigation, synthesis, classification, and reports. State the expected evidence and downstream handoff; choose Analysis or Edit deliberately.
Decision branch
Add an If / else node. Configure exclusive or multi-route evaluation, then each outgoing rule’s source, operator, comparison value, and fallback. It routes existing results; it does not by itself call a new model.
Delay
Pause this path for Duration (seconds), then continue. Use for deliberate pacing or waiting between actions. A delay is not a recurrence schedule and does not verify readiness of an external system.
Loop
Create a bounded Repeat count or For each item container. Place body steps inside it, connect body/done paths, choose count or collection input, and set the stop flag and Max iterations. Enable Require stop flag for a verification loop.
Subworkflow
Call a saved child workflow. Select the child, map inputs and outputs, set failure propagation, and bound Max depth. Reuse a research, audit, or approval routine in several parent graphs.
Log Collector
Collect a selected, bounded trace into the notebook/log destination. Choose sources, capture level, write mode, event types, statuses, size limits, and redaction. Add it where durable traceability is useful rather than collecting every transcript.
Join branches
Synchronize upstream results before the next handoff. Select the Join mode: Wait for all, Wait for any, Require all success, or Continue unless all failed. A join combines availability; it does not judge competing plans.
Verify and review changes
Add an agent-role step with a Verification reviewer template. It inspects the unpublished change set, uses relevant checks, reviews regressions, and reports findings, commands, verification, fixes, changed files, risk, and approval recommendation. The preset uses Edit mode to allow small safe fixes; change it if you need read-only review.
Failure recovery agent
Select the failed source step first. This option adds a failure branch and a recovery role carrying the failure context. It identifies the cause, repairs within the original scope, verifies, and escalates credentials, permissions, or product decisions. Inspect retry limits and route the repaired output back through the original gate.
GitHub push and PR
Add a publication role that consumes prior verification/review artifacts, prepares the intended commit, pushes a review branch, and opens a PR when authorized. It does not force-push or grant credentials. Review publication permissions and exact external-action scope before running.
Task and prompt step settings
Separate the worker’s assignment from the task or prompt it will receive.
| Field | How to configure it |
|---|---|
| Label | A short responsibility such as Collect evidence or Classify cases; it identifies the step in the graph and trace. |
| Include step in next workflow run / Run | Adds or removes the step from the next launch selection, not from the saved graph. |
| Task source | Specific task binds one chosen task. Workflow input task uses Run setup context for reuse. |
| Task picker | Filter by status, project, milestone, or search and select the intended task. A missing/deleted task needs a new binding. |
| Project | Sets the operating project for a prompt or role; coding execution needs the proper machine mapping. |
| Agent | Choose an active worker on the intended machine. Inspect capability diagnostics rather than relying on the display name. |
| Model / Effort | Use advertised options or the agent default. Higher effort is a tradeoff, not automatically the right choice for every stage. |
| Execution mode | Analysis: read-only planning or review. Edit: may change files. Actual permissions still depend on the adapter and owner policy. |
| Prompt / Extra prompt | Write the specific responsibility, allowed input/tool scope, acceptance checks, and handoff expectations. Extra prompt supplements task context. |
Changing a step’s agent or model can invalidate earlier capability evidence. Keep explicit handoffs small and select only the relevant upstream evidence in advanced configuration. Never include credentials in task text or variables.
Agent roles and strict output contracts
Role steps make responsibilities, evidence requirements, and execution expectations explicit.
- Add Verify and review changes or Failure recovery agent, or open an agent-role step in a preset.
- Choose a Role template, then customize Role label, Role objective, and Role instructions. Changing the template resets its role definition and default execution mode; review your edits afterward.
- Set Required artifacts and Required worker capabilities as comma-separated keys. Enable the checkbox labeled Require fresh operational evidence when real tool evidence is necessary.
- For strict output validation, enable the checkbox labeled Strictly validate declared outputs and retain immutable, versioned copies, then provide valid Strict artifact declarations (JSON). The selected Runner must support receipts and enforcement.
- Review the worker/model/effort, Analysis or Edit mode, retry/failure policy, and outgoing verification/recovery routes before running.
| Role template | Responsibility |
|---|---|
| Planner | Create an execution-ready plan. |
| Implementer | Perform scoped implementation. |
| Reviewer | Review correctness, regressions, and risks. |
| Tester | Verify the upstream result. |
| Judge | Select, synthesize, or reject competing results. |
| Supervisor | Gate progress against policy, risk, and evidence. |
| Failure recovery agent | Recover a failed step within its scope. |
| Handoff writer | Write a compact evidence handoff. |
| GitHub PR agent | Prepare an authorized reviewable GitHub PR. |
Declare verifiable artifacts
[
  {"key":"report","kind":"file","required":true,"parser":"text","maxBytes":100000},
  {"key":"source_index","kind":"file","required":true,"parser":"json","maxBytes":50000}
]
A declaration names key, kind, required status, parser/media expectations, byte limit, empty-file policy, and optionally supported JSON Schema constraints. Tell the worker which declared keys to emit and where to write files. Runner validates the actual bytes and stores immutable versions before strict success.
Required worker capabilities: source_read, file_write, shell, network, search, browser. A readable prompt about using a browser is not evidence of browser support. Artifact-only execution requires a non-empty strict output contract and a worker with enforceable filesystem support.
Branches and if / else decisions
Make both the expected path and exception path explicit.
- Select a step. Use Success task, Failure prompt, Delay, Log Collector, Loop, Subworkflow, Join, or Recover failure to add the corresponding branch. A decision node offers If task, Else prompt, and Nested decision; a loop offers Add inside loop and Add after loop.
- Select an edge to inspect From, To, and Condition. Ordinary conditions are success, failure, and always. Remove an unintended edge with its delete/remove control.
- For a Decision branch, set Routing to Exclusive first match or Multi-route all matches.
- Configure each outgoing rule’s Branch key, Branch label, Rule source, Operator, Compare value when needed, and Case sensitive setting.
- Choose Default branch. Use success/failure fallback when appropriate, and inspect the rule preview. A fallback should make missing or unsupported evidence visible.
| Rule source | What it evaluates |
|---|---|
| Result status (text) | Upstream execution status, such as succeeded. |
| Final output (text) | The upstream summary/output text. |
| Changed files (list) | Reported changed-file list. |
| Verification (json) | Structured verification output. |
| Branch name (text) | The upstream branch identifier. |
| Error message (text) | Reported failure text. |
| Operator | Meaning |
|---|---|
| contains / does not contain | Look for a configured fragment or its absence. |
| is / is not | Equality or inequality against the comparison value. |
| starts with / ends with | Prefix or suffix check. |
| is empty / is not empty | Presence check; no comparison value needed. |
| matches regex | A configured regular-expression match. |
| always / else | Fallback rule; no comparison value needed. |
Exclusive routing chooses the first matching rule; Multi-route can activate several matching branches. Keep branch keys unique and connect the intended destinations. Prefer structured checks for important acceptance criteria; parsing a persuasive summary is a weaker gate.
The advanced condition contract can also route on confidence and structured values or use an agent judge. For example, a reported score below a configured threshold may request a stronger independent reviewer. That numeric confidence rule is advanced configuration, not one of the six simple editor rule-source choices above.
Loops and verification gates
Bound repetition and define a clear path out of the loop.
- Add a Loop, or use Wrap selected steps in loop. Choose Loop mode: Repeat count or For each item.
- For Repeat count, enter a positive Fixed count or supply Count source such as
workflow.inputs.qaPassCount. For For each item, supply Item source such asworkflow.inputs.tasks. - Set Current item alias, Stop flag, Body branch, Done branch, and Max iterations. The editor allows 1–500 max iterations; use a much smaller task-appropriate bound.
- Inspect Loop body. Select an Existing step and Place inside loop, or use Add inside loop. Add after loop attaches the completion path.
- For verification, enable Require stop flag (verify loop). Ensure a passing verifier maps its result to the stop flag. Route exhaustion or failed repair to a bounded failure/review path.
| Field / variable | Meaning |
|---|---|
| Current item alias | The name body steps use for the current input item, for example currentTask. |
| Stop flag | A boolean workflow variable indicating accepted completion, commonly workflow.vars.stopLoop. |
| Body branch / Done branch | Stable keys identifying iteration work and the completion path. |
| Max iterations | Hard bound on repetitions, independent of a larger requested count. |
| Require stop flag | Without a passing flag, exhaustion fails the loop and follows failure edges rather than claiming completion. |
| loop.index / loop.count / loop.item | Current iteration index, count, and item. |
| loop.results / loop.last / currentItem | Accumulated results, last iteration result, and current-item context; the configured alias is also available. |
Parallel branches, joins, and advanced nodes
Synchronize results separately from evaluating their quality.
Independent eligible roots or branches can run concurrently within Runner capacity and the workflow session cap. Connect dependencies so a downstream step does not begin before the required inputs exist.
| Join mode | Result handling |
|---|---|
| Wait for all | Wait for every incoming branch before continuing. |
| Wait for any | Continue when an eligible incoming result becomes available. |
| Require all success | Continue only when every required branch succeeds. |
| Continue unless all failed | Allow progress with successful results unless every branch failed. |
Nodes present in presets or advanced graph configuration
| Kind | What to configure |
|---|---|
| Fuse | Select best_plan, consensus, synthesis, reviewer_arbitration, all_success, first_success, or manual. Configure evaluator, selected inputs, output contract, minimum successful branches, wait/timeout limits, artifact preservation, and failure policy: fail_fast, continue_with_successes, require_all, or ask_user. |
| Supervisor | Choose policy, agent_judge, or manual. Set allowed decisions (approve, reject, request_revision, choose_branch, synthesize, retry, ask_user, block), human-approval requirement, judge/prompt, inputs, outputs, and timeout behavior. |
| Wait | Represent an external or timed resumable wait with reason, duration/until value, and resume key as applicable. |
| Notebook logs | Select source node IDs, byte bound, include patterns, and redaction patterns for notebook-oriented context. |
| Agent preset | Bind a reusable preset key/version and parameters. |
| Agent role | The role definition and execution contract described in the preceding section. |
These typed kinds are supported by the graph contract but are not all entries in Add workflow step. Presets may already contain them; use validated MCP/API graph configuration or supervisor composition for settings not exposed in the visual editor. A Join is not a Fuse judge.
Reusable subworkflows and value mappings
Call a child graph with explicit inputs and collect its results.
- Add Subworkflow and choose Child workflow from your saved graphs.
- Choose Failure policy: Follow failure branch or Fail parent workflow. Set Max depth; the default is three.
- Under Inputs, choose Add input. Set source, target key, type or Infer, and Required. Remove obsolete mappings.
- Under Outputs, choose Add output. Set source, target variable, type or Infer, and Append if collecting repeated results. Remove obsolete mappings.
- Run a bounded example and confirm that the child received the intended input and that the parent’s output variable has the expected type.
| Mapping option | Example / behavior |
|---|---|
| Input source → target | workflow.inputs.task → task; without mappings the child inherits the current workflow context. |
| Output source → target | subworkflow_result.summary → childResult. |
| Type | Infer, Task, Task list, Text, Number, Boolean, JSON, File ref, Artifact ref, or Log bundle ref. |
| Required | A missing required child input must not silently become an empty value. |
| Append | Accumulate output values rather than replacing the target value. |
Keep child graphs reusable: input-driven tasks, explicit evidence outputs, bounded loops, and a clear failure policy. A nesting limit prevents recursive graph expansion from becoming unbounded work.
Log Collector options
Capture the trace you need without forwarding every transcript to every agent.
| Option | Use |
|---|---|
| Source steps | Choose explicit sources. An empty selection captures only directly connected critical task steps. |
| Capture level | summary, standard, or debug. Empty Event types uses the capture-level defaults. |
| Write mode | append adds to the destination, replace replaces it, and new page creates a separate page. |
| Max events | Bound capture to 1–500 events. |
| Max bytes | Bound the selected capture to 500–120,000 bytes. |
| Event types | created, claimed, confirmation requested, permission requested, input requested, agent message, command acknowledged, started, log, status, finished, failed, cancelled, heartbeat. |
| Source statuses | Queued, Preparing, Awaiting local confirmation, Running, Blocked, Ready for review, Failed, Cancelled. |
| Redact secrets and configured strings | Enable redaction; use Redaction strings to enter one literal string per line. Redaction does not replace careful input scoping. |
Full local bundles and notebook summaries are distinct outputs. Inspect the collector’s artifact pointer and the local retention settings. Do not add a collector when a structured handoff already contains all required evidence.
Workflow settings: durable defaults
These settings change the saved workflow, rather than only the next launch.
- Open Workflow settings on the selected graph.
- For Agent for runnable steps, choose an active worker and Apply only if you intend to replace the task/prompt assignments across the graph.
- Set Maximum concurrent agent sessions to 1–4 and Save.
- Close settings, inspect each affected step, and then configure launch-specific inputs in Run setup.
The session default caps live provider sessions across the workflow and its subworkflows. Queued work does not consume a slot. Other budgets and contract fields can come from a preset or advanced graph configuration; this popover is not an editor for every guardrail.
Run setup: inputs, workspace, and launch
Supply context for this run without changing the reusable workflow definition.
- Check the toolbar’s selected-step count. Use All, Clear, or per-step Run controls to select the intended execution set.
- Open Run setup. Filter tasks by Status, Project, Milestone, or search, then select the task inputs needed by the graph.
- Add Prompt input and JSON variables. Use qaPassCount and findingsPath when the graph references those fields.
- Choose Execution workspace and review the run session override. For shared coding mode, set Shared worktree / branch.
- If publication-capable nodes are selected, review Exact external-action scope. Otherwise leave publication authorization off.
- Review selected task input and choose Run with inputs. The main Run control starts the selected graph with its current launch settings; inspect them first.
| Field / choice | Meaning |
|---|---|
| Prompt input | A run-level brief available to workflow steps. |
| Coding workspace (automatic) | Use the selected Runner’s mapped coding workspace behavior. |
| Shared worktree / branch | Coordinate selected work on the named workflow worktree/branch. It requires the applicable Git mapping. |
| Artifact-only (no repository) | Use isolated Runner-owned input/output/scratch folders. No repo discovery, dependency bootstrap, Git finalization, PR, or deployment. Requires strict outputs and enforceable adapter support. |
| Run session limit override | Override the saved 1–4 live-session limit for this launch; blank uses the saved default. |
| Shared worktree / branch name | An explicit workflow branch such as feature/research-tools; not a caller-selected host directory. |
| qaPassCount | Number supplied to graphs that use workflow.inputs.qaPassCount for count-driven verification. |
| findingsPath | Output path used by the selected graph’s instructions or mappings; a variable is not permission to write arbitrary host paths. |
| JSON variables | A JSON object containing named input values. Validate syntax and avoid credentials. |
| Selected task input | Review the actual supplied task list, not just the picker filter. |
{
  "topic": "Market opportunities",
  "reportDate": "2026-10-09",
  "reviewRequired": true
}
A saved workflow can be launched repeatedly with new inputs. Input naming must match the graph’s references; adding a variable does not automatically wire it into a step. Partial selection is not a generic resume mechanism and may omit prerequisite context.
Live log, supervision, and recovery
Follow decisions and evidence as the graph executes.
- Open Live log. Inspect Nodes, Branches, Artifacts, Retries, and Guardrails metrics and the latest run state.
- Inspect Supervisor monitor for its last check, decision, reason, and action. Open the linked session when it needs a user decision.
- Use Jump to latest to follow new events. If a question is pending, Reply with facts; inspect approval scope before Approve or Deny.
- If blocked, resolve the cause and Resume when offered. Cancel when execution should end.
- Inspect a failure’s class, repair owner, attempt count, and evidence. Allow only the graph’s bounded repair route and re-run its original acceptance gate.
- Before accepting success, inspect the final artifacts and required verification, not only a green node or confidence score.
| Metric | Interpretation |
|---|---|
| Nodes | Succeeded, running, waiting, and failed node counts. |
| Branches | Selected/rejected paths, branch artifacts, and parallel fan-out. |
| Artifacts | Saved outputs, estimated bytes, log captures, and notebook writes. |
| Retries | Recovery attempts and waiting/resume timing. |
| Guardrails | Exceeded limits, root branches, and per-node fan-out bounds. |
Graph node states include queued, running, waiting, succeeded, failed, skipped, and cancelled. Worker sessions use their own labels described earlier. A skipped branch is not a failed worker. A reported confidence score can trigger configured review but is not calibrated accuracy.
Run budgets can bound node runs, assignments/spawns, aggregate recovery attempts, and wall-clock time. Advanced retries include maximum attempts, backoff, timeout, and on-failure policy. Preserve the final blocker instead of relaunching endlessly after a limit is exhausted.
Artifacts, private downloads, and memory
Inspect what each stage consumed, produced, and decided.
- Open Artifacts for the selected run. Inspect the Budget panel before investigating a long or repeated run.
- Review input/output handoffs and branch results, Fuse and supervisor decisions, recovery evidence, and selected log captures.
- Inspect artifact keys, status, confidence when reported, verification, failure class, repair owner, and referenced files. Compare evidence with the requested acceptance criteria.
- Use Private downloads for original validated files and exact versions available from this run. Availability requires the corresponding private export path and authorization.
- Read Episodes (run memory) for previous outcomes, failure evidence, and decisions relevant to future comparable work.
Strict outputs receive immutable local versions, opaque inflara-artifact://workflow-output/... references, and integrity digests. The reference is not an arbitrary public file URL. A downstream step resolves it through the authorized Runner scope and verifies its bytes.
Private local-artifact resolution is bound to the owning Runner. Keep consumers on that compatible Runner unless you have configured a supported, authorized transfer path; assigning another machine does not make its filesystem share the artifact automatically.
Memory records the observed outcome. Failed or unverified work should remain a warning or blocker, not a success instruction. Preserve decisions and supporting checks so reuse can be assessed.
Local bundle retention
inflara runner artifacts status --json
inflara runner artifacts prune --dry-run --older-than 14d
# Apply only after reviewing the dry run
inflara runner artifacts prune --yes --older-than 14d --max-bytes 256MB
Prune is dry-run by default without --yes; recently modified active files are skipped. The default local root is ~/.inflara/workflow-artifacts, with profile-specific isolation for named profiles. Retention environment controls include INFLARA_WORKFLOW_ARTIFACTS_DIR, INFLARA_WORKFLOW_ARTIFACT_MAX_EVENTS, INFLARA_WORKFLOW_ARTIFACT_MAX_TRANSCRIPT_BYTES, INFLARA_WORKFLOW_ARTIFACT_MAX_ROOT_BYTES, INFLARA_WORKFLOW_ARTIFACT_RETENTION_DAYS, and INFLARA_WORKFLOW_ARTIFACT_ACTIVE_GRACE_MINUTES.
Exact authorization for push and deploy
Publication is an additional scoped action, not an automatic consequence of a successful workflow.
- Verify the machine owner has enabled the applicable publication permission and the selected node is publication-capable. Artifact-only runs cannot publish.
- In Run setup, enable Exact external-action scope when it appears for the selected nodes.
- Choose Push approved commit and/or Deploy approved commit. Enter the Full commit SHA and inspect Workflow nodes, Branch, and Repository.
- Set Environment. For deploy, select Vercel, Netlify, or Cloudflare and the Deployment project. Local credentials and provider support are also required.
- Review the exact target and acceptance evidence before launching. An incomplete or mismatched authorization must be corrected, not bypassed.
The current exact-scope authorization expires 15 minutes after submission and binds the particular run/node/agent attempt and commit target. A retry with a different node-run or agent-run is rejected. A changed commit, branch, or destination needs a fresh appropriate authorization.
The GitHub push and PR step consumes current upstream verification and review evidence when available. It should not repeat valid checks unnecessarily or include unrelated changes. A prompt that says ‘deploy’ does not override owner policy or create the required scoped authorization.
Checkpoints and advanced execution contracts
Reuse only completed work whose evidence and authority remain valid.
A compatible strict node can emit a workflow execution checkpoint. Its validity binds inputs, output versions, contract/configuration, authority, and invalidation state. Changed inputs or relevant execution policy invalidate reuse; cancellation cannot be converted into late success.
There is no dedicated checkpoint-invalidation button in the current editor. Invalidation uses the persisted workflow_checkpoint_invalidation artifact/API path. Ask a supervisor or use the validated interface only within your authorized scope; do not assume partial step selection reproduces checkpoint semantics.
| Advanced contract area | What to specify |
|---|---|
| Inputs | Selected source nodes/branches, artifact keys, inclusion of workflow input, prior handoffs or logs, and max input bytes. |
| Role capabilities | Read/edit/shell/network/browser/request-user/publication permissions, tool allow/deny lists, required capability evidence, and optional bounded enrollment. |
| Outputs | Handoff kind, required keys, strict artifact declarations, whole-output schema, max output bytes, and mappings. |
| Retry and failure | Maximum attempts, backoff seconds, timeout, and fail_workflow, follow_failure_branch, retry_then_branch, or ask_user policy. |
| Variables and mappings | Declared typed inputs, output source/target mappings, required/default/append behavior, and bounded context. |
| Guardrails | Run/node/agent/recovery/wall-clock limits, branch/fan-out constraints, and session limits. |
| Attachments | none, manifest_only, selected, or all, according to the node policy and authorized inputs. |
Build a reusable research or automation recipe
Use these as design exercises after machine setup, not as evidence that a connector or capability is already installed.
Layered research
- Create a project and define the question, source scope, date bounds, and evidence standard.
- Ask the supervisor to draft discovery → parallel specialists → join → contradiction/evidence audit → synthesis → independent review. Add planning perspectives as needed.
- Require real source-access capabilities for each role and validate the binding. Use artifact-only only when the worker supports its enforcement and strict outputs.
- Declare the report, source index, and claim-evidence matrix as bounded artifacts. A successful search alone is not a source-read check.
- Run a small authorized fixture, inspect missing-evidence and review paths, then save the graph and supply a new question next time.
Repeatable support triage
- Begin with a small, authorized input batch. Use a JSON input list or selected tasks and a For each item loop.
- Classify, investigate, and verify each item; route missing evidence or uncertainty to independent review. Join the batch into a triage packet.
- Use configured tools for the actual data source and keep customer-facing actions behind explicit approval.
- Save the definition and document its authorized launch mechanism. A loop, a saved graph, or an example prompt does not install a schedule or enterprise connector.
- Measure accepted classifications, review burden, elapsed time, and human time saved against the old process.
Software delivery
Start from Adaptive Robust or a similarly scoped preset. Map the repository, verify model and role assignments, set a bounded test/fix gate, and inspect the final change set. Add exact publication authorization only when a reviewed commit should be pushed or deployed.
Update Runner and reload client configuration
Inspect the live service version as well as the installed binary.
inflara update
inflara doctor
inflara service status --all
Update replaces the shared CLI binary while preserving pairing, mappings, credentials, logs, and profiles. Supported managed macOS/Linux services drain active jobs and reload an installed update, even with automatic downloads disabled. The command reports per-profile restart results; a pending drain may finish later.
| Running process | After a manual update |
|---|---|
| Supported managed macOS/Linux service | Allow jobs and cleanup to finish. Check the reported restart result and subsequent live heartbeat/version. |
| Older managed service | Needs a one-time manual restart to load a release with installed-update reload support. Wait for work to finish, then use inflara service stop and inflara service start for the profile. |
| Foreground Runner | Finish active work, press Ctrl+C, then inflara runner start again. |
| Windows scheduled task | Finish work, end and restart the task or sign out/in. Named profiles use their own task name. |
schtasks /End /TN "Inflara Runner"
schtasks /Run /TN "Inflara Runner"
Automatic downloading is opt-in with inflara runner install-service --auto-update; disable downloads with --no-auto-update. Updates wait for idle execution. Disabling automatic downloads does not disable supported reloading of a binary installed manually.
If a release changes the skill or MCP configuration, rerun inflara setup-agents, inspect inflara mcp doctor, and start new agent-client sessions. Updating Runner does not refresh an already-open client’s loaded configuration.
Troubleshooting by symptom
Start with health and evidence, then repair the specific boundary that failed.
inflara doctor
inflara mcp doctor
inflara runner status
inflara runner logs --follow| Symptom | Next check |
|---|---|
| inflara command not found | Open a new terminal to reload PATH, or rerun the supported installer. |
| Agent is missing / No active agents | Verify the native CLI installation and sign-in on this machine. Check Runner’s service PATH, then restart or refresh detection. |
| MCP missing, duplicate aliases, or token conflicts | Use mcp doctor and repair --dry-run. Resolve the API token mismatch; do not substitute a Runner pairing token. |
| Project cannot run | Check project execution permission, paired instance, active worker, local path mapping, and its machine claim. |
| Runner offline / no heartbeat | Check API reachability, service/process state, logs, pairing/revocation, and actual loaded version. |
| RUNNER_ALREADY_ACTIVE | Inspect the named owning process; stop its foreground terminal or service. Use workers for concurrency, not another same-profile process. |
| Local folder overlaps a machine claim | Use a separate clone/folder for the other instance, or review and apply the printed owner unmap command. |
| Executable-config trust mismatch | Review the actual worktree snapshot and effective manifest. Reapproving a different unchanged folder will not fix it. |
| Capability denied / unknown / stale / unverified | Inspect owner grants, adapter/model/effort support, exact launch policy, and fresh evidence. Never treat the diagnostic as permission to weaken the gate. |
| Artifact-only rejected | Confirm enforceable adapter support, a non-empty strict output contract, and a compatible server/Runner. Publication nodes are not allowed. |
| Missing or invalid strict output | Inspect declared key/kind, actual path, containment, size, parser, schema, and validation receipt. Repair the output rather than accepting a summary. |
| Workflow waiting / blocked | Open the pending interaction, supply missing input or approval, and resume only when its cause is resolved. |
| Publication rejected | Check owner opt-in and exact commit/branch/repository/environment authorization, expiry, and attempt binding. |
| Budget or loop exhaustion | Inspect the final failure and repair evidence. Revise scope or constraints deliberately before launching a new bounded run. |
| Update installed but heartbeat old | Check per-profile service restart results. Older services, foreground processes, and Windows tasks need the appropriate manual restart. |
Daily command reference
Run these on the execution machine; use --profile when working with a named instance profile.
# Health, pairing, and inventory
inflara status --json
inflara doctor --json
inflara projects list
inflara profiles list

# Process and service operations
inflara runner status
inflara runner logs --follow
inflara service status --all
inflara service stop --profile <profile>
inflara service start --profile <profile>

# Local evaluation specs in the project
inflara eval list
inflara eval run --id <eval-id>
inflara eval report

# Remove a mapping or startup service when no work needs it
inflara projects remove <project-id>
inflara runner uninstall-service
Evaluation specs live under the project’s .inflara/evals/<id>/eval.json. Use a configured spec and pinned input/ref with outcome checks; the evaluation runner uses scratch worktrees. Separate quality, latency, cost, and adoption measures.
Commands in this guide are instructions to review and run yourself, not actions performed by this documentation page. Placeholder values such as <project-id>, <model>, and <effort> must be replaced with valid values from your setup.
Terms and operating boundaries
Use a shared vocabulary when reviewing a workflow.
| Term | Meaning |
|---|---|
| Workflow | A saved executable graph defining responsibilities, dependencies, and policy. |
| Run | One execution with specific inputs and its own state and trace. |
| Runner | The paired execution connector on a laptop, server, or provisioned VM. |
| Worker / agent | A detected native provider tool that executes a role assignment. |
| Supervisor | The coordinator or gate role that scopes, assigns, monitors, and escalates work. |
| Role pool | Saved worker/model/effort candidates for a supervisor responsibility. |
| Handoff | A bounded structured result passed to another stage. |
| Artifact | A named output or evidence record; strict file outputs also have immutable retained versions. |
| Capability | A tool’s availability, owner permission, and operational evidence under a specific policy. |
| Checkpoint | Validated completed work eligible for reuse only while its inputs/configuration/authority remain valid. |
| Reported confidence | Worker telemetry that can route review; not measured accuracy. |
| Recurring automation | A reusable process plus an authorized repeating launch mechanism and its data/tool integrations. |